Barcode Printer Buttons & LED Indicators Explained
Feed Button, Calibration, Factory Reset & Blinking Lights
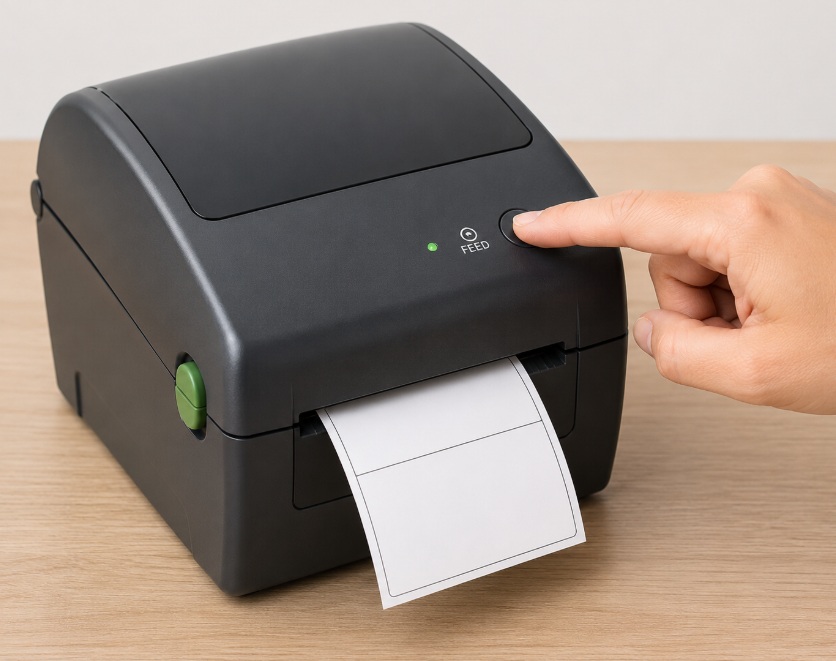
Whether you own a Zebra, Honeywell, TSC, SATO, GoDEX, Citizen, Toshiba TEC, Brother, Epson, Bixolon, or another thermal label printer, you've probably noticed that most printers have very few buttons—sometimes only a single Feed button accompanied by one or more LED indicators.
At first glance, this may seem overly simplistic, but those buttons actually perform dozens of different functions depending on how long they are pressed, when they are pressed, and the current state of the printer.
The LED indicators work together with these buttons to communicate the printer's status, helping users identify errors, perform calibration, print configuration labels, reset settings, and diagnose hardware problems without connecting to a computer.
Understanding these built-in controls can save time, reduce service calls, and solve many common printing problems within minutes.
In this guide, you'll learn how barcode printer buttons work, what different LED colours and flashing patterns mean, and how common functions such as media calibration and factory reset are typically performed.
Why Do Barcode Printers Have So Few Buttons?
Unlike office printers, thermal barcode printers are designed for reliability rather than convenience.
Instead of using multiple buttons and display screens, manufacturers keep the design simple by using:
- Feed button
- Pause button (some models)
- Cancel button (industrial models)
- One or more LED indicators
Most desktop barcode printers only include one multifunction button.
Although this may appear limited, the printer's firmware interprets:
- How long the button is held
- Whether the printer is powered on or off
- The current printer status
- The number of LED flashes
Each combination performs a different task.
This approach offers several advantages:
- Lower manufacturing cost
- Improved reliability
- Better resistance to dust and moisture
- Simpler user interface
- Fewer components that can fail
For most day-to-day operations, a single multifunction button is all that is required.
Understanding Button Press Types
One of the biggest sources of confusion is that the same button performs different actions depending on how it is pressed.
Most barcode printers recognise four common types of button operations.
1. Short Press
A quick press, usually lasting less than one second.
Most commonly used for:
- Feeding one label
- Resuming printing
- Confirming an operation
- Continuing after a pause
This is the button press used most frequently during normal operation.
2. Long Press
Holding the button for several seconds performs a completely different function.
Depending on the printer model, this may:
- Start media calibration
- Print a configuration label
- Print a network configuration
- Enter diagnostic mode
- Restore factory settings
Many printers use LED flashes to indicate which function will be activated when the button is released.
3. Hold While Powering On
Some maintenance functions are only available while turning the printer on.
The typical procedure is:
- Switch the printer off.
- Press and hold the Feed button.
- Turn the printer back on.
- Release the button after the required number of LED flashes.
This method is commonly used for:
- Factory reset
- Sensor calibration
- Printing diagnostic labels
- Firmware recovery
- Network reset
4. Multiple Button Combinations
Industrial printers often include additional buttons such as:
- Pause
- Cancel
- Menu
- Up
- Down
- Enter
Pressing two buttons together may perform advanced maintenance functions.
Examples include:
- Cancel + Pause
- Feed + Pause
- Menu + Enter
The available combinations vary between manufacturers.
The Feed Button Explained
The Feed button is the most important button on almost every barcode printer.
Although its name suggests it simply feeds labels, it actually performs many different functions.
Feed One Label
This is the default operation.
Pressing the Feed button once advances exactly one label.
This allows the printer to position the next label correctly before printing.
If the printer advances more than one label, media calibration is usually required.
Resume Printing
If printing has been paused because of:
- Media replacement
- Ribbon replacement
- Temporary error
- Manual pause
pressing the Feed button often resumes printing without cancelling the print job.
Confirm Printer Ready
Some industrial printers use the Feed button to acknowledge warning messages before printing resumes.
Cancel Temporary Errors
Certain non-critical errors disappear after:
- Closing the printhead
- Reloading labels
- Reloading ribbon
Pressing the Feed button tells the printer to continue normal operation.
What Happens When You Press Feed?
Although it looks simple, several operations occur inside the printer almost instantly.
The printer checks:
- Is media installed?
- Is the printhead closed?
- Can the media sensor detect the next label?
- Is the ribbon present (Thermal Transfer)?
- Are there any active errors?
If everything is correct:
- The motor rotates.
- The platen roller moves.
- The media sensor detects the next label.
- The printer stops precisely at the beginning of the following label.
This entire process usually takes less than one second.
When the Feed Button Doesn't Work
Many users believe the printer is faulty because pressing Feed produces no movement.
In reality, the printer is often protecting itself.
Common reasons include:
- Printhead is open
- Labels have run out
- Ribbon error
- Media Out error
- Sensor cannot detect the label gap
- Printer is paused
- Serious hardware fault
Always check the LED indicators before assuming the printer has failed.
Understanding LED Indicators
The LEDs on the front of a barcode printer are the printer's primary method of communicating with the user.
Rather than displaying text messages, they use:
- Colours
- Flashing speed
- Flashing sequence
- Solid lights
- Alternating colours
Together, these indicate the current operating status and any errors that require attention.
The exact colours and flash patterns vary between manufacturers, but the basic principles are very similar across most barcode printers.
Common LED Colours
Green
Green usually indicates normal operation.
Typical meanings include:
- Printer ready
- Printing
- Receiving data
- Online
- Idle
A solid green light generally means the printer is ready to print.
Red
Red almost always indicates an error that requires user attention.
Examples include:
- Printhead open
- Media Out
- Ribbon Out
- Sensor error
- Hardware fault
- Overheated printhead
Never ignore a persistent red LED. Determine the cause before continuing to print.
Amber (Orange)
Some manufacturers use an amber or orange LED to indicate a warning rather than a critical error.
Typical examples include:
- Paused printing
- Calibration in progress
- Maintenance mode
- Waiting for user input
Not all printers include an amber LED.
Blue
Modern wireless printers often include a blue LED for communication features such as:
- Bluetooth pairing
- Bluetooth connected
- Wi-Fi status
- Wireless setup mode
This indicator is independent of the printer's printing status.
LED Flash Patterns, Calibration, Configuration Labels & Factory Reset
In Part 1, we explained the purpose of the Feed button and the basic meanings of LED colours. In this section, we'll explore how barcode printers use blinking patterns to communicate with the user, and how the Feed button can perform advanced maintenance tasks such as media calibration, printing configuration labels, and restoring factory settings.
Although the exact procedures vary between manufacturers, the concepts are remarkably similar across most thermal barcode printers.
Understanding LED Flash Patterns
LED colours indicate the general status of the printer, while the blinking pattern provides more detailed information about what the printer is doing.
Most barcode printers use one or more of the following flash patterns.
Solid Light
A solid LED means the printer is in a stable condition.
Examples include:
- Ready to print
- Waiting for print data
- Powered on
- Connected to the computer
A solid green LED is usually the best indication that the printer is functioning normally.
Slow Blinking
A slow flash generally indicates that the printer is waiting for something to happen.
Common examples include:
- Calibration in progress
- Printer paused
- Waiting for media
- Temporary warning
This usually does not indicate a hardware fault.
Fast Blinking
Rapid flashing often means the printer requires immediate attention.
Typical causes include:
- Media Out
- Ribbon Out
- Printhead open
- Sensor error
- Communication error
Always check the printer before continuing to print.
Alternating Colours
Some printers alternate between two colours.
Examples:
Green → Red → Green → Red
or
Amber → Green
This commonly indicates:
- Startup diagnostics
- Firmware loading
- Factory reset
- Recovery mode
Never switch off the printer while alternating LEDs are displayed unless instructed by the manufacturer.
Continuous Flashing
If an LED continues flashing without stopping, the printer is usually waiting for user action.
Possible causes include:
- Close the printhead
- Load labels
- Install ribbon
- Press Feed
- Perform calibration
The printer will normally resume operation once the problem is corrected.
Why Do Barcode Printers Count LED Flashes?
Many desktop barcode printers have only one Feed button, yet they support numerous maintenance functions.
Manufacturers solve this by using LED flash counting.
The process usually works like this:
- Turn the printer off.
- Hold the Feed button.
- Turn the printer on.
- Continue holding the button.
- Watch the LED carefully.
- Release the button after a specific number of flashes.
Each flash count tells the printer which maintenance function you want to perform.
This method allows dozens of commands to be accessed using a single button.
Typical Feed Button Flash Sequence
Although every manufacturer uses slightly different timings, many barcode printers follow a similar concept.
|
Release After |
Typical Function |
|
1 Flash |
Print configuration label |
|
2 Flashes |
Media calibration |
|
3 Flashes |
Sensor profile |
|
4 Flashes |
Factory defaults |
|
5 Flashes |
Advanced diagnostics |
|
Hold Longer |
Firmware or recovery mode |
Important: This table illustrates the general concept only. Always consult your printer's manual for the exact flash sequence, as timings vary between brands and models.
Media Calibration
One of the most frequently used maintenance functions is Media Calibration.
Calibration teaches the printer how to recognise the labels currently installed.
Without proper calibration, the printer may:
- Skip labels
- Feed multiple labels
- Print across two labels
- Display Media Out
- Stop in the wrong position
What Happens During Calibration?
Many users think calibration simply feeds a few labels.
In reality, the printer performs several measurements.
It determines:
- Label length
- Gap size
- Black mark position
- Sensor sensitivity
- Light passing through the liner
- Reflective sensor response (if used)
The printer then stores these values in memory.
When Should You Perform Calibration?
Media calibration is recommended whenever you:
- Change label size
- Switch from gap labels to black mark labels
- Install a new label roll
- Replace the media sensor
- Reset the printer
- Experience skipped labels
- Receive repeated Media Out errors
Routine calibration helps maintain accurate label positioning.
Signs That Calibration Is Needed
You should recalibrate if your printer:
- Feeds several blank labels
- Prints too high or too low
- Prints across multiple labels
- Stops between labels
- Cannot detect the label gap
- Reports Media Out with labels installed
These symptoms often indicate that the stored media settings no longer match the installed labels.
Printing a Configuration Label
Almost every barcode printer can print a Configuration Label without using a computer.
This feature is invaluable for troubleshooting and verifying printer settings.
A configuration label typically includes:
- Printer model
- Serial number
- Firmware version
- Printhead resolution (203, 300 or 600 DPI)
- Darkness setting
- Print speed
- Memory information
- Communication settings
- Sensor type
- Media configuration
Printing this label is often the first step when diagnosing printer problems.
Why Configuration Labels Are Useful
A configuration label allows you to confirm that:
- The printer is functioning correctly.
- The printhead is producing a complete image.
- The firmware version is current.
- The media settings are correct.
- The installed resolution matches your label design.
It can also provide valuable information when contacting technical support.
Printing a Network Configuration Label
Network-enabled printers usually offer a separate network status report.
This report may include:
- IP address
- Subnet mask
- Gateway
- MAC address
- DHCP or Static IP
- Host name
- Wireless settings (if applicable)
This information is especially useful when a printer cannot be found on the network.
Sensor Profile
Many professional barcode printers include a Sensor Profile function.
Rather than printing ordinary text, this function analyses the media sensor's readings and prints a graph or data pattern showing how the sensor detects the labels.
A sensor profile can help diagnose problems such as:
- Difficult-to-detect label gaps
- Poorly printed black marks
- Transparent labels
- Coloured liners
- Contaminated sensors
- Incorrect sensor positioning
Technicians often use this feature to determine whether a sensor issue is caused by the media or the printer itself.
Factory Reset
A factory reset restores most printer settings to their original default values.
This can resolve problems caused by incorrect configuration changes or corrupted settings.
A factory reset typically restores:
- Label dimensions
- Print darkness
- Print speed
- Sensor settings
- Communication settings
- Calibration data
- User preferences
However, some models may retain information such as the printer's serial number, firmware version, and internal counters.
When Should You Perform a Factory Reset?
A factory reset may be appropriate when:
- The printer behaves unexpectedly after configuration changes.
- Media settings cannot be corrected.
- Communication settings are unknown.
- The printer is being deployed to a new location.
- Technical support recommends resetting the printer.
Remember that a factory reset will remove custom settings, so you may need to reconfigure the printer afterward.
Before Performing a Factory Reset
Before resetting your printer, it is good practice to:
- Print a configuration label.
- Record the current network settings.
- Note any custom media or print settings.
- Back up configurations if your printer or management software supports it.
This makes it much easier to restore the printer to its previous configuration if needed.
Diagnostic Modes, Reset Functions, Brand Differences & Troubleshooting
In the previous sections, we explained how barcode printer buttons perform different functions depending on how they are pressed and how LED indicators communicate the printer's status. In this final part, we'll look at advanced maintenance features, common button combinations, manufacturer differences, and how to interpret LED errors before calling technical support.
Network Reset
Many modern barcode printers include Ethernet, Wi-Fi, or Bluetooth connectivity. If the printer cannot be found on the network or has been assigned an incorrect IP address, a network reset may restore communication.
A network reset usually restores:
- DHCP settings
- Static IP address
- Gateway
- Subnet mask
- DNS settings
- Wireless configuration (on supported models)
Unlike a factory reset, a network reset only affects communication settings and normally leaves print settings unchanged.
When Should You Perform a Network Reset?
A network reset may be useful when:
- The printer cannot be found on the network.
- The IP address is unknown.
- The printer was moved to another office.
- Static IP settings conflict with the network.
- Wireless configuration is incorrect.
After resetting the network settings, print a Network Configuration Label to identify the new IP address.
Diagnostic Modes
Professional barcode printers include diagnostic functions that help technicians identify problems without dismantling the printer.
Diagnostic modes may include:
- Printhead test
- Sensor test
- Motor test
- Memory test
- Communication test
- Configuration report
- Network report
- Self-test labels
These functions vary between manufacturers but are invaluable when troubleshooting.
Self-Test Labels
A self-test label is printed directly by the printer without requiring a computer or label software.
It helps determine whether a problem originates from the printer or the computer.
A self-test label typically verifies:
- Printhead operation
- Print quality
- Darkness setting
- Motor accuracy
- Sensor operation
- Firmware status
If the self-test prints correctly but labels sent from the computer fail, the problem is usually related to the driver, software, or communication rather than the printer itself.
Sensor Diagnostic Mode
Some industrial printers allow you to monitor the sensor readings in real time.
This mode displays or prints information such as:
- Gap detection
- Black mark detection
- Label length
- Sensor values
- Reflective sensor readings
- Transmissive sensor readings
These diagnostics are especially useful when working with:
- Transparent labels
- Coloured liners
- Small jewellery labels
- Black mark labels
- Continuous media
Pause Button Functions
Many industrial barcode printers include a Pause button.
Unlike the Feed button, which advances media, the Pause button temporarily stops printing without cancelling the print job.
Typical uses include:
- Pausing long print jobs
- Reloading labels
- Replacing ribbon
- Inspecting print quality
- Clearing minor issues
Once the issue has been resolved, pressing the Pause button again usually resumes printing from where it stopped.
Cancel Button Functions
Industrial printers may also include a Cancel button.
This button allows the user to:
- Cancel the current print job
- Clear buffered data
- Stop multiple labels from printing
- Exit certain maintenance modes
Using the Cancel button is safer than simply switching off the printer, especially during large print jobs.
Menu Buttons
Higher-end barcode printers often feature:
- Menu
- Enter
- Escape
- Up
- Down
- Left
- Right
These buttons allow direct access to printer settings without connecting to a computer.
Typical menu functions include:
- Print speed
- Print darkness
- Label dimensions
- Communication settings
- Sensor selection
- Language
- Date and time
- Password protection
Industrial printers often include LCD or colour touch screens that make configuration much easier.
Why Manufacturers Use Flash Counting
Many users wonder why manufacturers don't simply add more buttons.
The answer is simplicity.
A single multifunction button reduces:
- Manufacturing cost
- Mechanical wear
- Dust entry points
- Water ingress
- Failure rates
Instead of adding extra hardware, the firmware counts LED flashes and performs different maintenance functions based on when the button is released.
This design has been used successfully for many years across numerous barcode printer brands.
Manufacturer Differences
Although the concepts discussed in this guide are universal, every manufacturer implements them slightly differently.
Zebra
Zebra printers are well known for their LED flash-count system. Holding the Feed button while powering on allows access to functions such as configuration labels, media calibration, diagnostics, and factory reset.
Honeywell
Honeywell printers use similar maintenance procedures but may include dedicated buttons or menu options depending on the model.
TSC
Many TSC printers support Feed-button maintenance functions as well as LCD menus on industrial models.
SATO
SATO printers frequently include service menus and advanced diagnostic modes, particularly on industrial printers.
GoDEX
GoDEX printers use Feed-button combinations for calibration and self-test functions, with menu-driven configuration available on higher-end models.
Citizen
Citizen barcode printers provide simple button operations for calibration and diagnostics, with industrial models offering additional menu options.
Toshiba TEC
Toshiba TEC industrial printers often include LCD displays and extensive diagnostic features accessible through menu navigation.
Brother
Desktop Brother label printers typically provide fewer maintenance options because they are designed for office use rather than industrial barcode printing.
Epson
Thermal receipt printers from Epson use different button layouts but still rely on LED indicators for reporting errors such as paper out, cover open, and communication problems.
Common LED Errors and Their Meaning
|
LED Status |
Possible Cause |
Recommended Action |
|
Solid Green |
Printer ready |
No action required |
|
Flashing Green |
Receiving data or printing |
Wait for completion |
|
Solid Red |
Critical error |
Check printer status |
|
Flashing Red |
Media, ribbon, or sensor issue |
Reload media and inspect sensors |
|
Red + Green Alternating |
Calibration or diagnostics |
Allow the process to finish |
|
No LEDs |
No power |
Check the power adapter, cable, and switch |
When the Printer Appears Dead
If no LEDs illuminate when the printer is powered on:
Check:
- Power outlet
- Power cable
- Power adapter voltage
- Power switch
- Internal fuse (where applicable)
Do not immediately assume the printer's mainboard has failed. A faulty power adapter is one of the most common causes of a printer appearing completely unresponsive.
Safety Tips
Following these precautions will help prevent accidental damage while using maintenance functions.
✔ Always close the printhead before starting calibration.
✔ Never disconnect power during firmware updates.
✔ Do not perform a factory reset unless necessary.
✔ Print a configuration label before changing important settings.
✔ Back up network settings before performing a network reset.
✔ Use only labels and ribbons that are compatible with your printer.
✔ Follow the manufacturer's recommended maintenance procedures.
Frequently Asked Questions
Why doesn't the Feed button move the labels?
The printer may be paused, out of labels, have an open printhead, a ribbon error, or a media sensor problem. Check the LED indicators to identify the cause before assuming the printer is faulty.
Why does holding the Feed button print labels?
Many printers use different hold durations to activate maintenance functions. Releasing the button after a specific number of LED flashes tells the printer which operation to perform, such as printing a configuration label or starting media calibration.
Why is my printer blinking red?
A flashing red LED usually indicates that user attention is required. Common causes include:
- Media Out
- Ribbon Out
- Printhead open
- Sensor error
- Communication issue
Refer to your printer's manual for the exact meaning of the flash pattern.
Can I perform a factory reset without a computer?
Yes. Most barcode printers allow factory reset using button combinations during power-up. However, the procedure varies by manufacturer and model.
Will a factory reset erase everything?
A factory reset usually restores printer settings to their defaults, but it does not erase the printer's firmware, serial number, or hardware information. Custom settings such as network configuration, media parameters, and print preferences may need to be reconfigured afterward.
Conclusion
Although barcode printers may appear to have only a few simple buttons, those buttons provide access to a powerful set of maintenance and diagnostic functions. Combined with LED indicators, they allow users to perform media calibration, print configuration reports, reset settings, diagnose hardware issues, and restore normal operation—all without requiring additional software.
While the exact button sequences and LED patterns vary between manufacturers, the underlying concepts remain largely the same. Learning how these controls work not only makes troubleshooting faster but also reduces unnecessary downtime and service costs.
Before assuming a printer has failed, take a moment to observe the LED indicators, verify the printer's status, and use the built-in maintenance functions. In many cases, a simple calibration, configuration check, or media adjustment is all that is needed to restore reliable printing.
With a basic understanding of button functions and LED indicators, you'll be better equipped to maintain your barcode printer, solve common issues independently, and keep your printing operations running smoothly.
Trademark Disclaimer: All company names, brand names, product names, logos, and trademarks mentioned on this website belong to their respective owners. Their use is for identification, educational, informational, and compatibility purposes only and does not imply any affiliation or endorsement.