How to Know If Your Label Printer Printhead Is Dirty or Damaged
A label printer's printhead is one of its most important-and most sensitive-components. It is responsible for transferring heat to the label material or ribbon to create the printed image.
When print quality starts getting worse, many users immediately assume that the printhead is damaged. However, poor printing does not always mean a failed printhead. Dust, adhesive residue, incorrect darkness settings, poor-quality labels, a damaged ribbon, or incorrect printhead pressure can all produce similar symptoms.
Knowing the difference between a printhead that needs cleaning and one that needs replacement can save time, reduce unnecessary maintenance costs, and prevent damage to the printer.
This guide explains the most common warning signs and how to diagnose them.
1. What Does a Label Printer Printhead Do?
A thermal printhead contains hundreds or thousands of tiny heating elements arranged in a line.
Depending on the printer and printing method, the printhead works in one of two ways:
- Direct thermal printing - the printhead heats specially coated thermal labels.
- Thermal transfer printing - the printhead heats a ribbon, transferring ink onto the label.
The heating elements are extremely small. If even a small section becomes contaminated or damaged, you may see a white line, missing text, incomplete barcode, or other print defect.
Because the printhead directly contacts the media or ribbon, it gradually accumulates:
- Dust
- Paper debris
- Adhesive
- Ribbon residue
- Carbon deposits
- Label coating residue
Regular cleaning is therefore an essential part of label-printer maintenance.
2. The Most Common Signs of a Dirty Printhead
A dirty printhead can produce symptoms that look very similar to a damaged printhead.
Before replacing the printhead, cleaning should normally be the first troubleshooting step.
Common symptoms include:
2.1 White Vertical Lines Through the Print
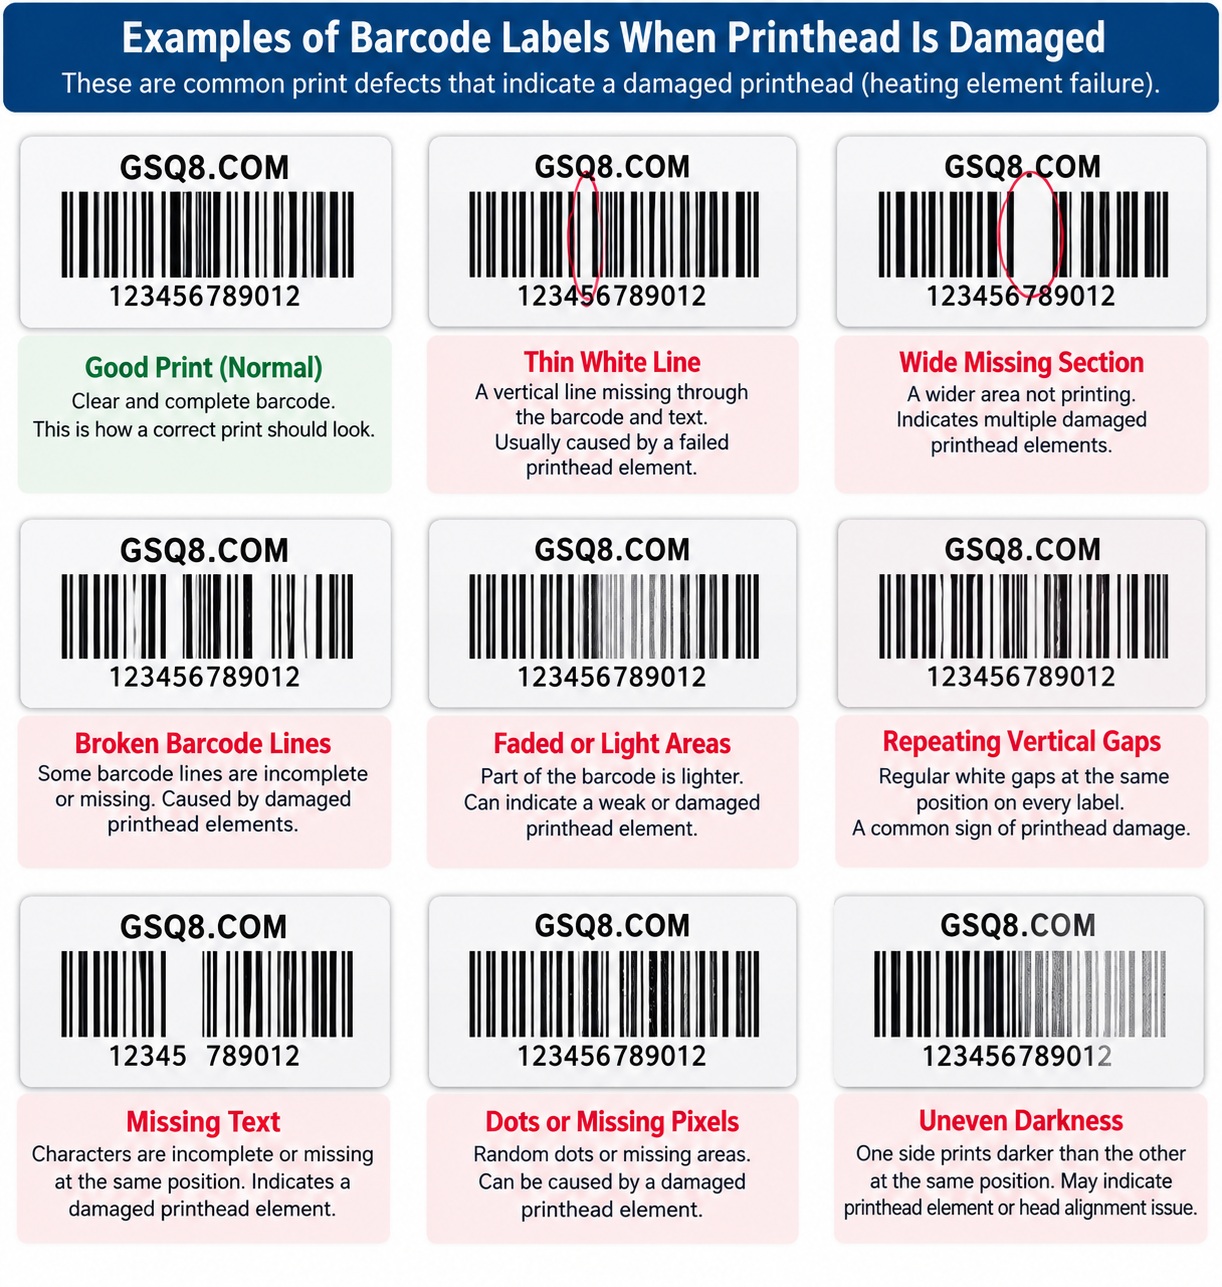
One of the most common signs is a thin, vertical white line running through text, graphics or barcodes.
For example:
ABC12345
may print more like:
ABC 12345
with a narrow area missing throughout the label.
If the missing area corresponds to contamination on the printhead, cleaning may completely restore the print.
2.2 Missing Sections of Text
Letters may appear incomplete.
For example:
- A printed as part of an A
- B missing one side
- Numbers partially missing
- Small text becoming difficult to read
If the defect occurs consistently in the same vertical position across multiple labels, inspect and clean the printhead.
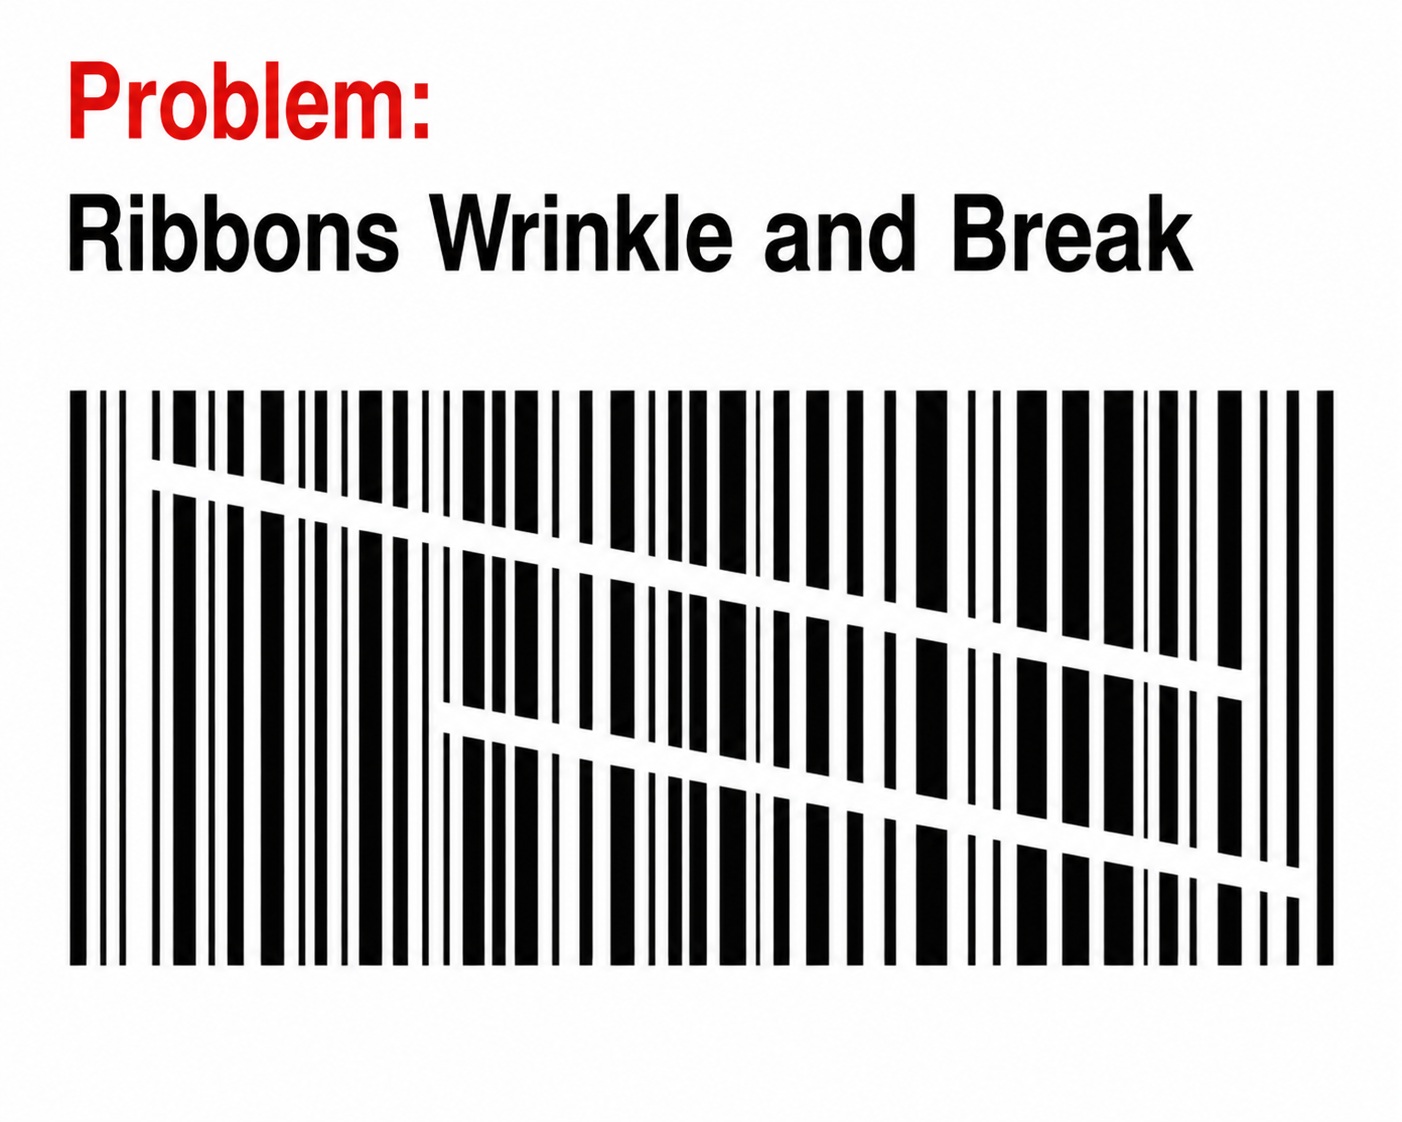
2.3 Barcode Lines Missing
A dirty printhead can cause portions of a barcode to disappear.
This is particularly important because a barcode can look acceptable to the eye but fail to scan reliably.
If barcode printing suddenly becomes inconsistent, clean the printhead before assuming that the printhead has failed.
2.4 Uneven Print Darkness
You may notice that one section of the label is darker than another.
For example:
Left side: dark and clear
Middle: lighter
Right side: dark and clear
This can be caused by contamination, incorrect printhead pressure, media problems, or printhead alignment.
2.5 Small Spots or Repeating Defects
Small dots, marks or repeating imperfections can sometimes be caused by debris stuck to the printhead.
If the defect disappears after cleaning, the printhead itself may still be perfectly usable.
3. How to Clean the Printhead
Before deciding that a printhead needs replacement, clean it properly.
Step 1 - Turn Off the Printer
Switch off the printer and disconnect power if appropriate.
Allow the printhead to cool before touching it.
Never clean a hot printhead.
Step 2 - Open the Printhead Assembly
Open the printer according to the manufacturer's instructions and carefully expose the printhead.
Do not touch the heating element with your fingers.
Finger oils can contaminate the printhead surface.
Step 3 - Use the Correct Cleaning Material
Use a printhead cleaning pen or lint-free cloth with an appropriate printhead cleaning solution, normally isopropyl alcohol where the printer manufacturer permits it.
Gently wipe along the printhead's heating line.
Do not scrape the surface.
Do not use:
- Knives
- Screwdrivers
- Metal objects
- Abrasive materials
- Rough paper
- Excessive force
The ceramic/glass surface and heating elements can be damaged easily.
Step 4 - Allow the Printhead to Dry
Allow the cleaning solution to evaporate completely before reinstalling media and printing.
Then perform another test print.
4. When Cleaning Does NOT Fix the Problem
If the exact same white line or missing print remains after the printhead has been properly cleaned, there is a possibility that one or more heating elements are damaged.
This is one of the most important diagnostic clues.
Example:
Before cleaning:
██████ | █████████
After cleaning:
██████ | █████████
If the same vertical missing section remains in exactly the same location, the problem may be a damaged printhead element rather than dirt.
5. Signs That the Printhead May Be Physically Damaged
A damaged printhead usually produces a consistent defect in the same position.
Look for the following symptoms.
5.1 Permanent Vertical White Line
A narrow white line that appears on every label in exactly the same position is one of the strongest signs of a damaged heating element.
If cleaning does not remove it, replacement may be necessary.
5.2 A Group of Missing Pixels
Instead of one thin line, you may see a larger area where printing is completely absent.
This can indicate that multiple heating elements are no longer functioning.
5.3 Barcode Always Has the Same Missing Lines
If the same barcode bars repeatedly disappear in the same location, and cleaning does not correct the issue, inspect the printhead carefully.
A failed heating element cannot be restored through cleaning.
5.4 The Same Defect Appears on Every Label
Print several labels with the same design.
If the defect:
- Appears in exactly the same position
- Has a consistent width
- Remains after cleaning
- Appears with different label designs
then the printhead should be considered a possible cause.
6. Physical Damage to the Printhead
Sometimes the problem can be seen during inspection.
Look for:
- Scratches across the heating line
- Cracks
- Burn marks
- Discoloration
- Damaged protective coating
- Adhesive that cannot be removed
- Foreign material embedded around the heating elements
A scratched printhead can produce permanent print defects.
Important:
Do not attempt to polish, scrape or sand the printhead.
A damaged printhead normally needs replacement.
7. Burned Printhead Elements
Thermal printheads operate at high temperatures.
Incorrect printer settings, excessive heat, incompatible media, poor ribbon quality, insufficient cooling, or mechanical problems can contribute to premature printhead wear.
A burned or failed heating element cannot normally be repaired.
If individual elements have stopped working, the printhead must generally be replaced.
8. Printhead Damage Caused by Ribbon Problems
Thermal-transfer printers require the ribbon to be correctly installed.
A ribbon that is:
- Installed incorrectly
- Wrinkled
- Poor quality
- Too narrow
- Not suitable for the media
- Running with excessive friction
can contribute to poor printing and printhead wear.
Before replacing a printhead, check that the ribbon is installed correctly and is compatible with the printer and label material.
9. Printhead Damage Caused by Adhesive
Label adhesive is another common cause of printhead problems.
If adhesive from the label gets onto the printhead, it can:
- Reduce print quality
- Create white lines
- Cause uneven darkness
- Increase friction
- Cause labels or ribbon to stick
- Eventually contribute to printhead damage
This is particularly common when using poor-quality labels or labels with exposed adhesive.
Regular cleaning helps prevent adhesive buildup.
10. Printhead Pressure Can Also Cause Print Problems
Not every print defect is caused by the printhead itself.
Many label printers have adjustable printhead pressure.
Incorrect pressure can produce:
- One side darker than the other
- Uneven printing
- Poor barcode quality
- Ribbon wrinkling
- Excessive printhead wear
If the print is significantly darker on one side, check printhead pressure and media alignment before replacing the printhead.
11. Don't Confuse a Bad Printhead With Bad Labels
Labels themselves can cause poor print quality.
Test the printer with a known-good roll of compatible media.
Poor or damaged labels can result in:
- Uneven darkness
- Missing areas
- Poor contrast
- Adhesive contamination
- Inconsistent thermal response
If the printer works correctly with another roll, the original media may be the problem.
12. Check the Ribbon Before Replacing the Printhead
For thermal-transfer printing, also test another compatible ribbon.
A ribbon can cause:
- Light printing
- Uneven printing
- Ribbon wrinkles
- Missing sections
- Poor barcode quality
- Excessive residue
If changing the ribbon fixes the problem, replacing the printhead would have been unnecessary.
13. Check Print Darkness and Speed
Printer settings can significantly affect print quality.
If the print is too light, users sometimes increase darkness to the maximum.
This is not always the correct solution.
Excessive heat can increase printhead wear.
Instead:
- Check the manufacturer's recommended darkness range.
- Try a moderate darkness setting.
- Reduce print speed if necessary.
- Test with the correct media and ribbon combination.
The goal is to achieve the required print quality using the lowest practical heat/darkness setting.
14. A Simple Printhead Troubleshooting Test
Use this procedure before ordering a replacement printhead.
Test 1 - Print a test label
Look carefully for:
- Vertical white lines
- Missing pixels
- Uneven darkness
- Repeating marks
- Missing barcode elements
Test 2 - Clean the printhead
Clean it according to the printer manufacturer's instructions.
Test 3 - Print again
Compare the new label with the original.
Test 4 - Try another label roll
Use known-good compatible media.
Test 5 - Try another ribbon
If the printer uses thermal transfer, install a known-good compatible ribbon.
Test 6 - Check printer settings
Check:
- Print darkness
- Print speed
- Media type
- Ribbon settings
- Printhead pressure
- Label calibration
Test 7 - Print several labels
A damaged printhead element normally produces a defect in the same physical location on every label.
15. Dirty vs Damaged Printhead
|
Symptom |
Possible Cause |
Cleaning May Help? |
Replacement May Be Required? |
|
Thin white vertical line |
Dirt/debris |
Yes |
If permanent |
|
Missing text |
Dirt or failed element |
Yes |
If permanent |
|
Uneven darkness |
Dirt/pressure/settings |
Yes |
Sometimes |
|
Poor barcode |
Dirt/ribbon/settings |
Yes |
If elements are damaged |
|
Adhesive on printhead |
Label adhesive |
Yes |
If damage has occurred |
|
Scratched heating line |
Physical damage |
No |
Yes |
|
Burned element |
Electrical/thermal damage |
No |
Yes |
|
Print defect remains after cleaning |
Failed element |
No |
Likely |
|
Defect changes position |
Media/ribbon/settings |
Possibly |
Usually no |
|
Entire print is light |
Settings/media/ribbon |
Possibly |
Usually no |
16. The Most Important Rule: Look for Repeatability
One of the easiest ways to identify a printhead problem is to check whether the defect repeats in the same location.
Imagine printing ten labels.
If every label has a white line exactly 35 mm from the left edge, there is likely a problem with a particular section of the print path-potentially the printhead.
If the defect moves around from label to label, investigate:
- Label quality
- Ribbon
- Dust
- Media tracking
- Printhead pressure
- Printer settings
- Mechanical alignment
before replacing the printhead.
17. When Should You Replace the Printhead?
A printhead should generally be considered for replacement when:
- Cleaning does not resolve the defect.
- The same missing line appears on every label.
- Specific heating elements have failed.
- The printhead has visible physical damage.
- The heating line is scratched or burned.
- Print quality has permanently deteriorated.
- Barcodes remain defective despite using known-good media and correct settings.
- The manufacturer or service technician confirms printhead failure.
A printhead is a wear component, so replacement is eventually normal for heavily used label printers.
18. Before Ordering a Replacement Printhead
Do not order a printhead based only on the printer model name.
Check the exact:
- Printer model
- Printer series
- Printhead part number
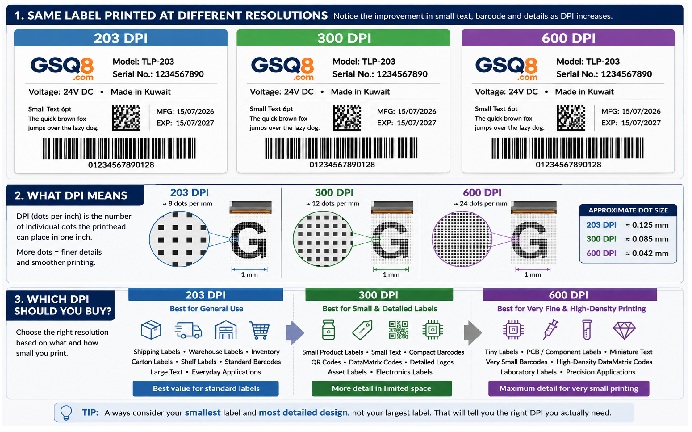
- Printhead resolution, such as 203 dpi, 300 dpi or 600 dpi
- Print width
- Printer revision where applicable
Some printers have multiple printhead options.
For example, a printer family may be available with both 203 dpi and 300 dpi printheads. These are not necessarily interchangeable.
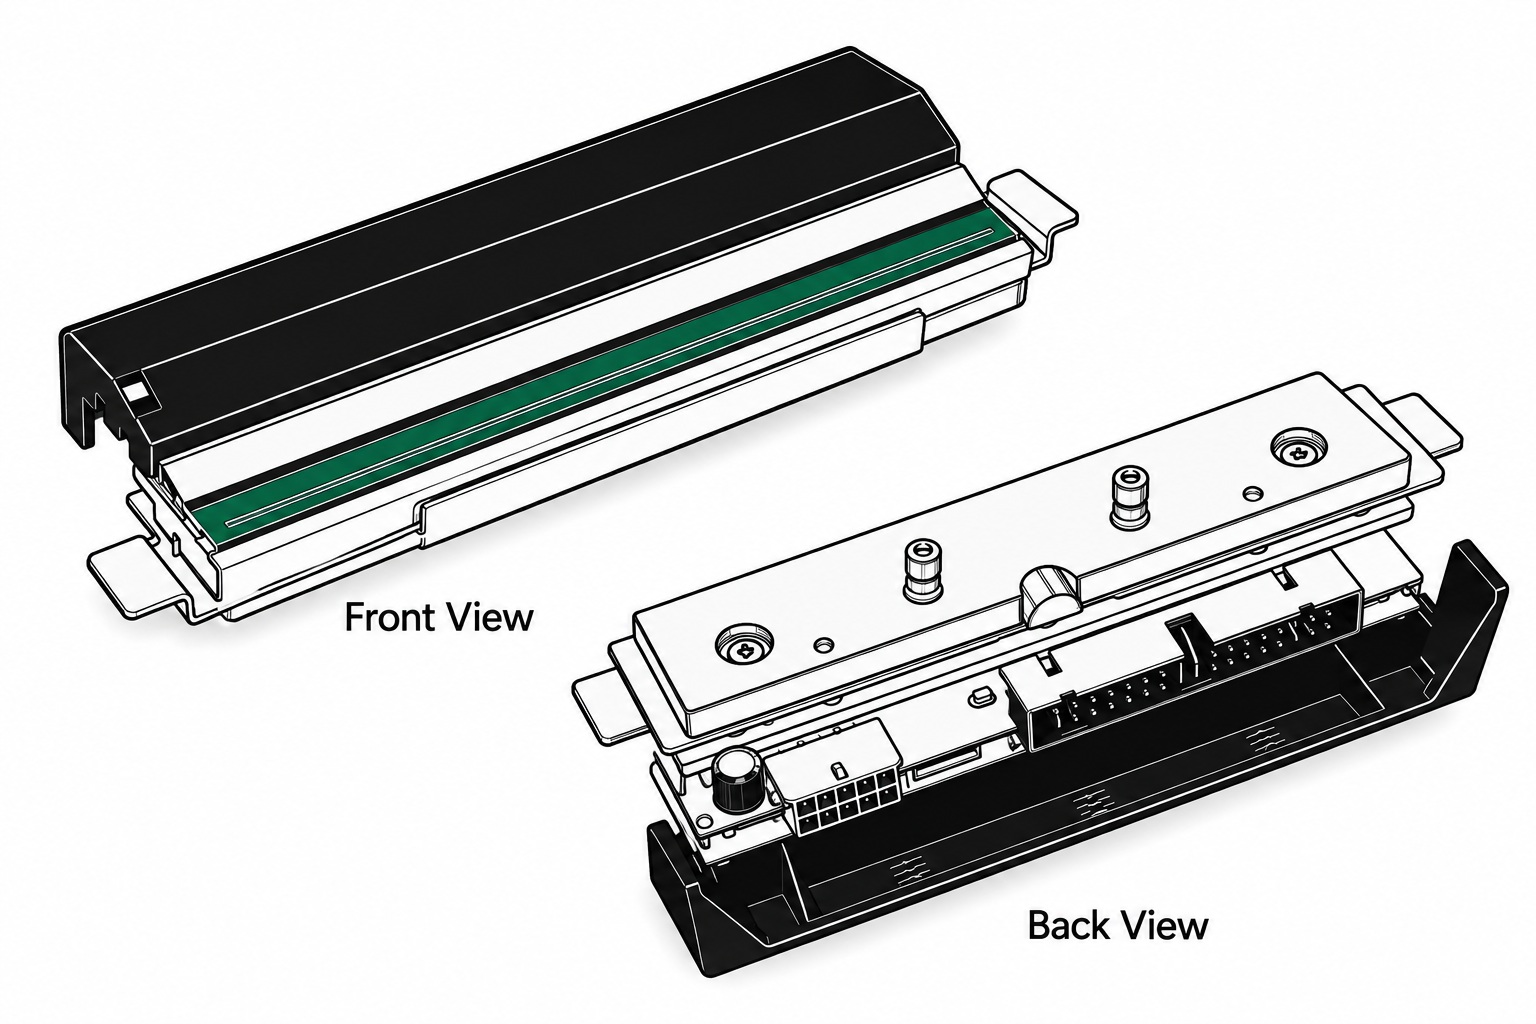
The safest approach is to compare the part number printed on the existing printhead or verify compatibility using the printer's exact model and serial information.
19. How to Extend Printhead Life
A few simple maintenance practices can significantly reduce unnecessary printhead wear.
Clean regularly
Do not wait until print quality becomes poor.
Clean the printhead according to the manufacturer's recommended maintenance schedule and whenever contamination is visible.
Use good-quality media
Poor-quality labels can contain excessive dust, coating residue or adhesive.
Use the correct ribbon
For thermal-transfer printing, use a ribbon appropriate for the label material and printer.
Avoid excessive darkness
Use only enough printhead heat to achieve the required print quality.
Keep the printer clean
Dust and debris can migrate into the print mechanism.
Handle the printhead carefully
Avoid touching the heating element with your fingers or sharp objects.
20. Quick Decision Guide
Print is poor → Clean the printhead first.
↓
Print improves after cleaning → Printhead was likely dirty.
↓
Print does not improve → Check labels, ribbon and settings.
↓
Defect remains in exactly the same position → Printhead may have a failed element.
↓
Visible scratch/burn/crack → Printhead may require replacement.
↓
Correct media + ribbon + settings + cleaning still don't fix it → Consider printhead replacement or professional inspection.
GSQ8 Recommendation
Clean before you replace.
A dirty printhead is much more common than many users realize, and a proper cleaning can restore print quality without replacing an expensive component.
However, if a specific vertical line, missing pixels or barcode defect remains in exactly the same position after cleaning and after testing with known-good labels and ribbon, the printhead may have damaged heating elements and replacement is usually the appropriate solution.
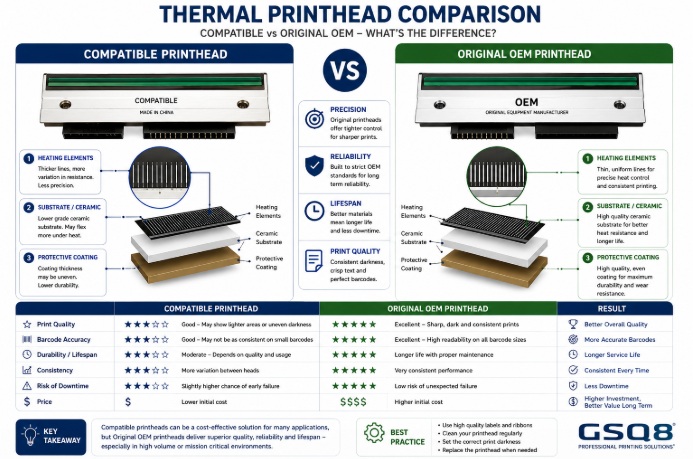
When purchasing a replacement, always verify the exact printer model, printhead resolution and part number rather than relying only on the appearance of the printhead.
A good maintenance routine-regular cleaning, compatible labels and ribbons, correct print settings, and avoiding excessive printhead heat-can help extend the life of your label printer's printhead.