How to Configure a New Zebra ZT231 or ZT411 Printer on a Network
A Zebra ZT231 or ZT411 can be connected to your business network so that multiple computers, workstations, warehouse systems, POS systems, and other applications can print labels to the same printer.
The most reliable setup is to give the printer a predictable IP address, configure the network settings correctly, install the appropriate Zebra Windows driver, and create a TCP/IP printer port.
In this guide, we will show you how to configure a Zebra ZT231 or ZT411 on an Ethernet network, including DHCP, static IP configuration, Windows installation, printer testing, and common troubleshooting steps.
Applies to: Zebra ZT231 and Zebra ZT411 industrial label printers with Ethernet/network connectivity.
What You Will Need
Before starting, prepare the following:
- Zebra ZT231 or ZT411 printer
- Ethernet network cable
- Network switch or router
- Windows 10 or Windows 11 computer
- Zebra printer driver
- Zebra Setup Utilities
- Access to your network settings
- Printer labels and ribbon, if using thermal-transfer printing
You should also know whether your network uses DHCP and, if you are assigning a static IP, obtain the correct network information from your IT administrator.
Example network settings
|
Setting |
Example |
|
IP Address |
192.168.1.50 |
|
Subnet Mask |
255.255.255.0 |
|
Gateway |
192.168.1.1 |
|
DNS |
192.168.1.1 |
Important: These are examples only. Do not use these addresses unless they are appropriate for your network.
Step 1: Connect the Zebra Printer to Your Network
First, connect the Ethernet cable to the printer's network port.
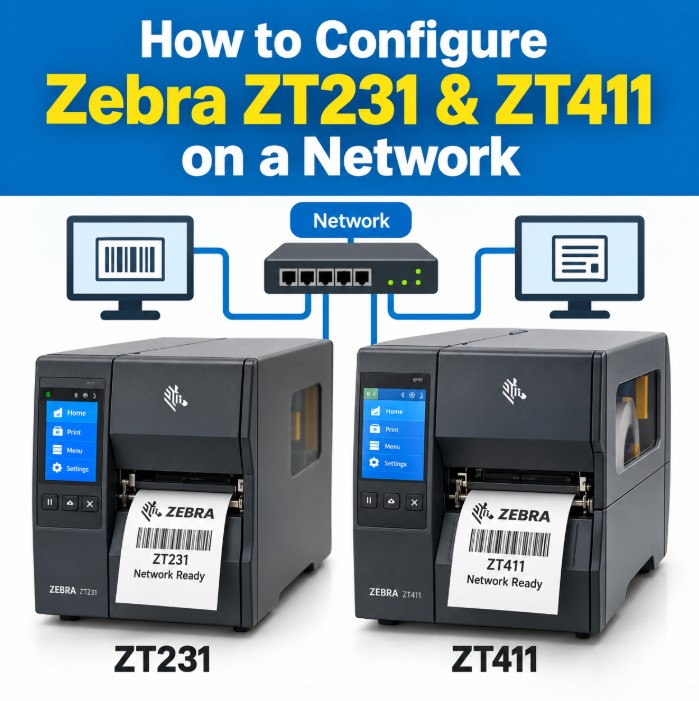
The basic connection should look like this:
Zebra Printer → Network Switch → Router/Network → Computer
Power on the printer and allow it to complete its startup.
Make sure:
- The Ethernet cable is securely connected.
- The switch/network port is active.
- The computer is connected to the same business network.
- The printer has the required Ethernet/network hardware.
The ZT231 and ZT411 support wired network configuration through their network settings when the appropriate connectivity hardware is installed.
Recommended image
Screenshot/illustration:
Show a ZT231 and ZT411 connected to an Ethernet switch.
Suggested image caption:
Connect the Zebra printer to your network switch using an Ethernet cable.
Step 2: Decide Between DHCP and Static IP
Before configuring the printer, decide how its IP address will be assigned.
There are two common options:
Option 1: DHCP
DHCP allows your network's DHCP server to automatically assign an IP address to the printer.
For example:
192.168.1.72
This is the easiest way to get the printer onto the network initially.
Option 2: Static IP
A static IP is manually assigned to the printer.
For example:
192.168.1.50
A fixed address can make printer management easier because applications and computers always know where to find the printer.
Which should you use?
For a business environment, we recommend either:
DHCP reservation
or a properly assigned:
Static IP address
A DHCP reservation is often convenient because the network administrator can manage the address centrally while ensuring the printer receives the same address.
If your IT administrator specifically requires a manually configured static IP, use the address supplied by them.
Step 3: Find the Zebra Printer's IP Address
If DHCP is enabled, your network server should assign the printer an IP address automatically.
On the printer, open the network settings.
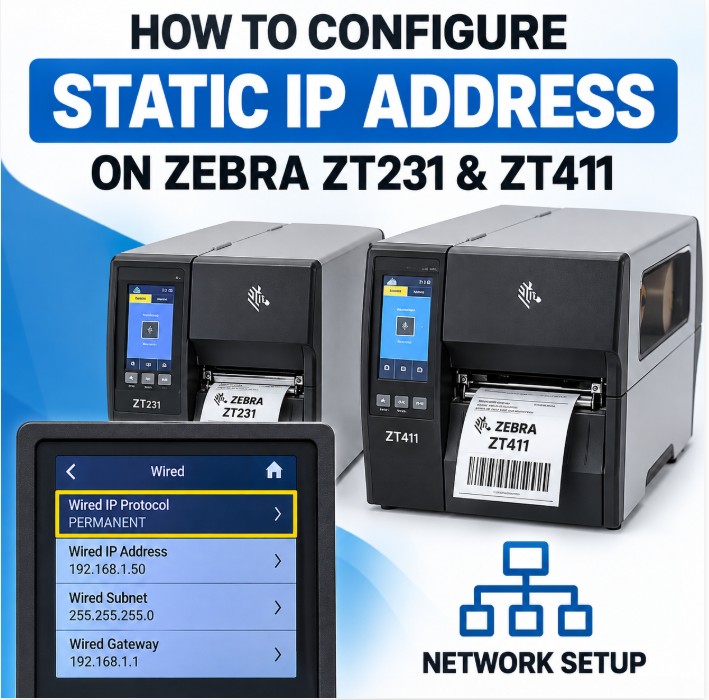
For the ZT231, the relevant settings are under:
Connection → Wired
The ZT231 documentation includes settings such as:
- Wired IP Address
- Wired Subnet
- Wired Gateway
- Wired IP Protocol
The ZT411 has corresponding wired network settings under its Connection menu.
Look for an IP address such as:
192.168.1.72
Record this address.
You can also find the address from your DHCP server/router by identifying the printer's MAC address.
Step 4: Check the Printer's IP Address From Windows
On your Windows computer, press:
Windows + R
Type:
cmd
and press Enter.
Then enter:
ping 192.168.1.72
Replace 192.168.1.72 with your printer's actual IP address.
A successful result should look similar to:
Reply from 192.168.1.72: bytes=32 time<1ms TTL=64
This confirms that your computer can communicate with the printer over the network.
If you get "Request timed out"
Check:
- Printer IP address
- Ethernet cable
- Network switch
- PC network connection
- Subnet mask
- VLAN configuration
- Firewall/network security
- Whether the printer is actually connected to the same network
Do not move on to the Windows printer installation until basic network communication is working.
Step 5: Open the Zebra Printer's Web Interface
Once you know the printer's IP address, open a web browser.
Enter:
http://192.168.1.72
Replace the example IP with the actual address of your printer.
If network communication is working, the Zebra printer's web interface should open.
The printer's web interface provides access to network and printer configuration information.
Zebra documents the TCP/IP configuration through:
View and Modify Printer Settings → Network Communications Setup → TCP/IP Settings.
Recommended screenshot
Capture the printer's web interface showing the network/TCP-IP configuration page.
Suggested caption:
Zebra printer web interface showing TCP/IP network settings.
Step 6: Configure a Static IP Address
If you need a permanent IP address, you can configure it directly on the printer.
For example, your IT administrator may provide:
IP Address: 192.168.1.50
Subnet Mask: 255.255.255.0
Gateway: 192.168.1.1
Enter the values supplied by your network administrator.
On the Zebra ZT231
Go to:
Connection → Wired
Then configure the appropriate:
- Wired IP Address
- Wired Subnet
- Wired Gateway
- Wired IP Protocol
Zebra's ZT231 documentation confirms these settings and specifies that manually entered network values are saved by setting Wired IP Protocol to PERMANENT.
On the Zebra ZT411
Go to:
Connection → Wired
The ZT411 provides the corresponding IP address, subnet, gateway and IP protocol settings. Zebra's documentation also identifies these settings in the printer's web interface.
Step 7: Set the IP Protocol to Permanent
This is an important step when manually assigning an IP address.
If you enter:
IP Address: 192.168.1.50
Subnet: 255.255.255.0
Gateway: 192.168.1.1
you need to ensure that the printer is configured to use the manually entered values rather than obtaining them automatically from DHCP.
Set:
Wired IP Protocol → PERMANENT
Zebra specifically documents this requirement for manually configured wired network settings on both the ZT231 and ZT411.
After changing the settings, the network connection may reset.
Step 8: Save the Network Configuration
Before leaving the network settings, check all values carefully.
For example:
IP Address: 192.168.1.50
Subnet: 255.255.255.0
Gateway: 192.168.1.1
IP Protocol: PERMANENT
Apply/save the configuration.
Allow the printer's network interface to restart if required.
Then check the printer's IP address again.
Step 9: Test the New Static IP
On your Windows computer, open Command Prompt again.
Type:
ping 192.168.1.50
You should receive replies.
Then open:
http://192.168.1.50
in your web browser.
If the Zebra web interface opens, the printer is successfully reachable at its new IP address.
Step 10: Install Zebra Setup Utilities
Zebra provides Zebra Setup Utilities (ZSU) for Windows.
The software includes tools for configuring Zebra printers and has a Connectivity Wizard that can assist with wired and wireless network configuration.
Download the latest version from Zebra:
Download Zebra Printer Setup Utilities
Install Zebra Setup Utilities on the Windows computer.
What Zebra Setup Utilities can help with
It provides tools for:
- Printer setup
- Network connectivity
- Printer settings
- Print quality
- Diagnostics
- Printer commands
- Firmware/configuration tasks
Step 11: Install the Zebra Windows Driver
Next, install the appropriate Zebra Windows printer driver.
For many Zebra printers, the driver is identified as a ZDesigner driver.
During installation:
- Select the correct printer model.
- Select the appropriate driver.
- Choose the network/TCP-IP connection when applicable.
- Enter the printer's IP address.
- Complete the installation.
Important installation tip
If possible, install the Zebra driver before connecting the printer to Windows by USB.
Zebra's support guidance warns that connecting a printer by USB before installing the driver can cause Windows to identify it incorrectly as an unknown/unspecified device.
For a network installation, you normally do not need to connect the printer to the PC using USB.
Step 12: Add the Zebra Printer to Windows
Open:
Settings → Bluetooth & devices → Printers & scanners
Select:
Add device
If Windows does not automatically find the Zebra printer, choose the option to add it manually.
Select an option that allows you to add a printer using:
IP address or hostname
Enter the printer's IP address.
For example:
192.168.1.50
Install/select the appropriate Zebra printer driver.
Step 13: Check the Printer's TCP/IP Port
After the printer is installed, verify the Windows port.
Open:
Control Panel → Devices and Printers
Right-click the Zebra printer and select:
Printer properties
Open the:
Ports
tab.
You should see a port configured for the printer's network IP address.
For example:
IP_192.168.1.50
The important point is that Windows must send print jobs to the printer's current IP address.
Avoid this common problem
A printer can be working perfectly on the network while Windows is still configured to print through:
- USB001
- An old IP address
- WSD
- Another TCP/IP port
If this happens, Windows may show the printer as offline even though the printer itself is working correctly.
Step 14: Print a Windows Test Page
Open:
Printer Properties → General
Click:
Print Test Page
The label printer should receive the print job.
If the test page prints successfully, Windows is communicating with the Zebra printer.
However, this is not the final test.
Step 15: Print a Zebra Configuration Label
It is also useful to print the printer's configuration information.
Depending on the printer configuration, the configuration information can show details such as:
- Printer model
- Firmware version
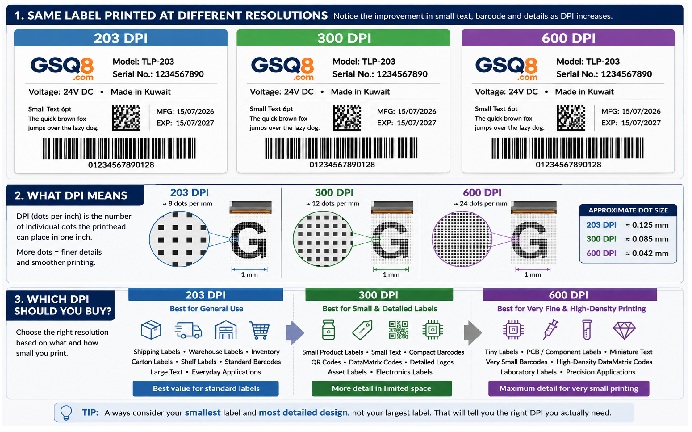
- Printhead resolution
- IP address
- Subnet
- Gateway
- Network information
- Printer settings
Keep this information for future troubleshooting.
Step 16: Configure Your Labels and Media
Network configuration only establishes communication.
You still need to configure the printer for the labels you are using.
Check:
- Label width
- Label height
- Gap
- Black mark settings
- Continuous media settings
- Media sensing method
- Thermal-transfer/direct-thermal mode
- Ribbon settings
- Print speed
- Print darkness
The physical media must match the printer configuration.
Step 17: Calibrate the Printer
If the printer does not correctly detect the beginning and end of each label, perform a media calibration.
Calibration is particularly important if:
- Labels stop in the wrong position.
- The printer skips labels.
- Several labels feed at once.
- The printer reports a media-out error.
- Printing starts too high or too low.
Make sure the correct sensing method is selected before calibration.
Step 18: Test From Your Real Business Software
A Windows test page is useful, but it does not prove that your actual application is configured correctly.
Print a real label from your:
- ERP system
- Warehouse management system
- POS software
- Shipping application
- Inventory software
- Label design software
- Browser-based application
Check:
- Label dimensions
- Text position
- Barcode position
- Barcode readability
- Print darkness
- Print speed
- Number of labels
- Label feeding
If everything looks correct, your Zebra network installation is complete.
Troubleshooting Zebra ZT231 and ZT411 Network Problems
Zebra printer has no IP address
Check:
- Ethernet cable.
- Network switch port.
- DHCP availability.
- Printer's wired network settings.
- Whether the printer has the required network hardware.
Printer has an IP address but cannot be pinged
Check:
- PC IP address
- Printer IP address
- Subnet mask
- VLAN
- Ethernet cable
- Switch port
- Network firewall
- Network access-control policies
Printer responds to ping but does not print
If ping works, the network connection is probably functioning.
Check:
Printer Properties → Ports
Make sure Windows is using the correct IP address.
Also verify that the correct Zebra driver is installed.
Printer suddenly shows Offline
First check the printer's current IP address.
For example, Windows may still be configured for:
192.168.1.50
while DHCP has assigned the printer:
192.168.1.83
In that situation, Windows is sending the print job to the wrong address.
A DHCP reservation or properly configured static IP can prevent this problem.
Printer works with USB but not Ethernet
If USB printing works, the printer itself is likely functioning.
Focus your troubleshooting on:
- Ethernet cable
- Switch
- IP configuration
- DHCP
- Subnet
- VLAN
- Windows TCP/IP port
- Firewall/security settings
Recommended Network Configuration
For a typical business installation, we recommend this setup:
INTERNET
│
ROUTER
│
NETWORK SWITCH
│
┌────────────┼────────────┐
│ │ │
PC 1 PC 2 SERVER
│ │ │
└────────────┼────────────┘
│
ZEBRA ZT231
192.168.1.50
The printer should have a predictable address and the Windows computers should use a TCP/IP printer port pointing to that address.
ZT231 vs ZT411 Network Setup
The basic network configuration process is very similar between the two printers.
|
Feature |
ZT231 |
ZT411 |
|
Industrial label printer |
✓ |
✓ |
|
Wired Ethernet networking |
Available with applicable configuration |
Available with applicable configuration |
|
DHCP |
✓ |
✓ |
|
Manual/static IP |
✓ |
✓ |
|
Wired IP settings |
✓ |
✓ |
|
Subnet configuration |
✓ |
✓ |
|
Gateway configuration |
✓ |
✓ |
|
Web-based printer configuration |
✓ |
✓ |
|
Zebra Setup Utilities |
✓ |
✓ |
|
Windows network printing |
✓ |
✓ |
The exact menu appearance can differ because of firmware and display differences, but Zebra's documentation uses the Connection → Wired settings for the relevant network configuration on these models.
Best Practices for Zebra Network Printers
Use a predictable IP address
For business printers, avoid allowing the IP address to change unexpectedly.
Record the printer information
Keep a list such as:
|
Printer Name |
Location |
Model |
IP |
|
WH-ZEBRA-01 |
Warehouse |
ZT231 |
192.168.1.50 |
|
SHIP-ZEBRA-01 |
Shipping |
ZT411 |
192.168.1.51 |
Don't randomly assign IP addresses
Always make sure the address is available and belongs to the correct network range.
Keep a configuration record
Record:
- Printer model
- Serial number
- IP address
- MAC address
- Location
- Driver version
- Firmware version
- Label size
- Media type
This makes future troubleshooting much easier.
Zebra ZT231 & ZT411 Network Setup Checklist
Before considering the installation complete, verify:
- Ethernet cable connected
- Printer powered on
- Network link active
- Printer has an IP address
- IP address recorded
- PC can ping printer
- Printer web interface opens
- DHCP/static IP configuration confirmed
- IP address is not duplicated
- Zebra Setup Utilities installed
- Correct Zebra driver installed
- TCP/IP port configured
- Windows test page printed
- Configuration label printed
- Correct labels loaded
- Printer calibrated
- Real production label printed
- Printer details documented
Frequently Asked Questions
How do I find the IP address of my Zebra ZT231?
Open the printer's wired network settings and check the Wired IP Address. If DHCP is enabled, the address can also be found on your DHCP server/router.
How do I find the IP address of my Zebra ZT411?
On the ZT411, go to the printer's Connection → Wired network settings and check the wired IP address. Zebra's ZT411 guide documents the IP address, subnet, gateway and IP protocol settings in this section.
How do I set a static IP on a Zebra ZT231?
Go to Connection → Wired, enter the required IP address, subnet and gateway, and configure Wired IP Protocol as PERMANENT.
How do I set a static IP on a Zebra ZT411?
Use Connection → Wired to configure the wired IP address, subnet and gateway, then set the IP protocol appropriately for a manually assigned address. Zebra documents the same TCP/IP parameters in the ZT411 user guide.
Can several computers print to one Zebra printer?
Yes. Once the printer is connected to the network, multiple computers and applications can send print jobs to it, provided each computer is correctly configured with the appropriate printer driver and network port.
Does the Zebra ZT231 or ZT411 need internet access?
No. Internet access is not normally required for local network printing. The printer and computers simply need appropriate network connectivity.
Why can I ping the Zebra printer but cannot print?
Ping only confirms basic IP connectivity. Check the Windows printer driver and Ports setting. Windows may be using the wrong IP address, WSD port, USB port, or an old TCP/IP port.
Should I use DHCP or a static IP?
For business environments, use either a DHCP reservation or a properly assigned static IP. The main objective is to ensure that the printer has a predictable address.
Conclusion
Configuring a Zebra ZT231 or ZT411 network printer involves three main stages:
1. Connect
Connect the printer to the Ethernet network and obtain an IP address.
2. Configure
Use DHCP or configure the printer with the correct static IP, subnet and gateway.
3. Install
Install the Zebra driver in Windows, create the correct TCP/IP port, and test printing.
Once these steps are completed, your ZT231 or ZT411 can be used as a reliable network label printer for warehouses, offices, retail stores, logistics operations, manufacturing facilities, shipping departments and other business environments.
For a new business installation, our recommendation is to use a predictable IP address, document the printer's network information, use the correct Zebra driver, and always test a real production label before putting the printer into daily operation.